
@Malaka Spice
It’s been close to 10 days here and my routine here is as challenging as ever. I realize that if it’s your first time here, then it does take a while to adjust and adapt. The first time I had a 4 hour practice I was incredulous … and didn’t know how to deal with it. Rather, I didn’t know how to make the most of it. When I practice at home it’s only for an hour and a half, and by the end of it I’m drained out. So the first few days here, I was always exhausted. So much so that I felt I couldn’t give the best in the asanas and always felt sloppy and ungainly throughout the practice. Mondays and Tuesdays specially, since practice on those days is almost 4 hours long, and by the time I’m done with practice its an ordeal just to walk home. My fantasies these days centre around buying an apartment next to the institute so that I can crawl home in no time and surface again only for the next class.
However, now I’ve started to get used to the routine. I’m actually able to make the most of the extended practice sessions. In fact, 2 hours is just about enough time for a satisfying practice…how I’m going to sustain this when I’m back in Bangalore is the stuff other blog posts are made of.
Yesterday I had my class in the evening (where I’m referred to as ‘Bangalore’, and another

Milk tea just this once 🙂
girl is called ‘USA’, oh and then there’s ‘Madam China’ in the 6 am session). It was an amazingly intense session. The class was fast paced with a focus on stretching the lower body (Janu Sirsasana, Paschimottansana, Baddhakonasana etc). Finally we did the Upavista Konasana, which is a challenging pose for me. I slowly made my way down and eased my torso onto the floor. I remember the days when I started practicing yoga and this pose was a big challenge. I wouldn’t be able to extend my back and my hip joint was stiff. As the years went by, I was still pretty reluctant to practice this pose because it didn’t come naturally at all and it was frustrating. Even now, sometimes I’m able to execute this pose well, and sometimes I feel like lead.
Yesterday I was able to ease myself down and placed my forehead on the floor. I stayed there kind of happy and satisfied with myself. There’s always an element of pleasant surprise also, because some days your body can extend and some days it just doesn’t. This reverie lasted until I heard, “BANGALORE! You’re sleeping! Extend more! Walk forward with your hands!!! That’s it, that’s good. Trance mein chali gayi thi phir se.”
And I realized that for the most part, this is how I practice. I arrange myself into a pose and then my mind says, “This is it, you’ve done well. You’re done.” And then my pose goes dead, and progress stops. Or, as the teacher said, I fall asleep. So when I was told to extend more, I had to push through the limitations of my mind (kind of still the internal dialogue) and discover if I could, in fact, go further. I realized that I could, and for that little bit of time I experienced new life. And received a bit of enlightenment.
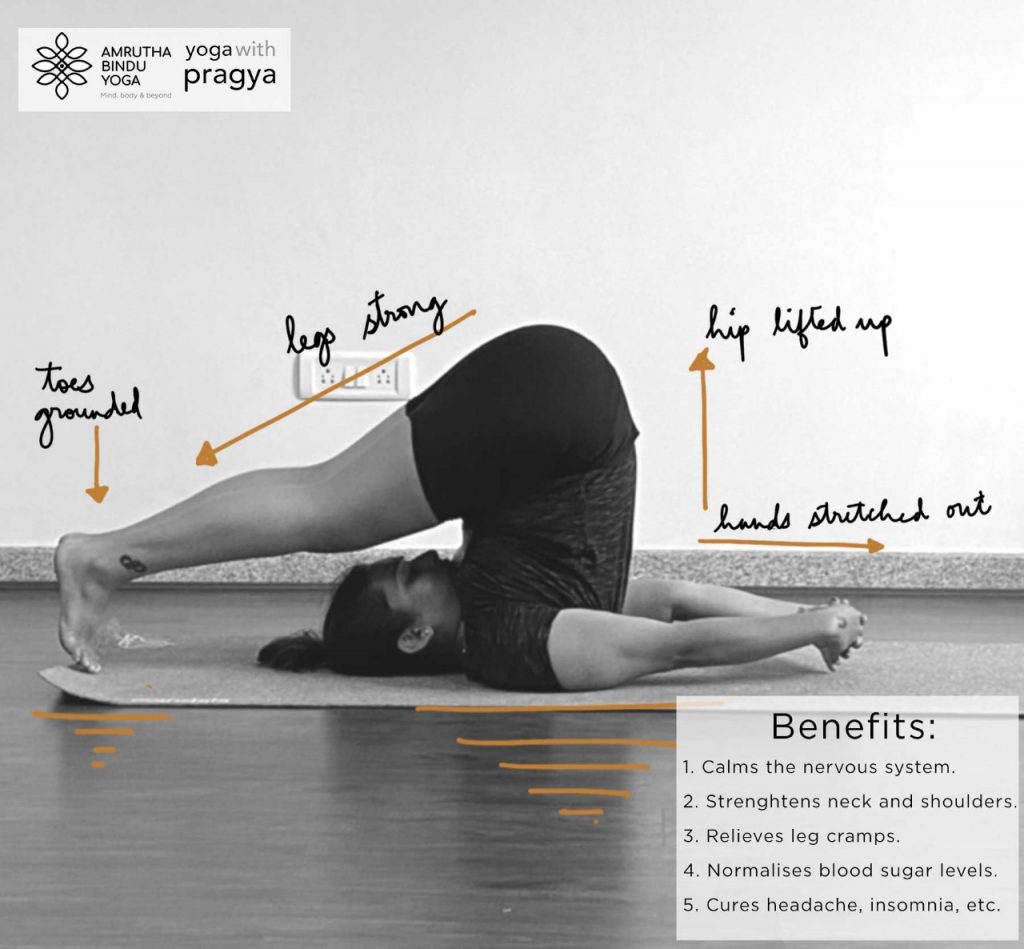
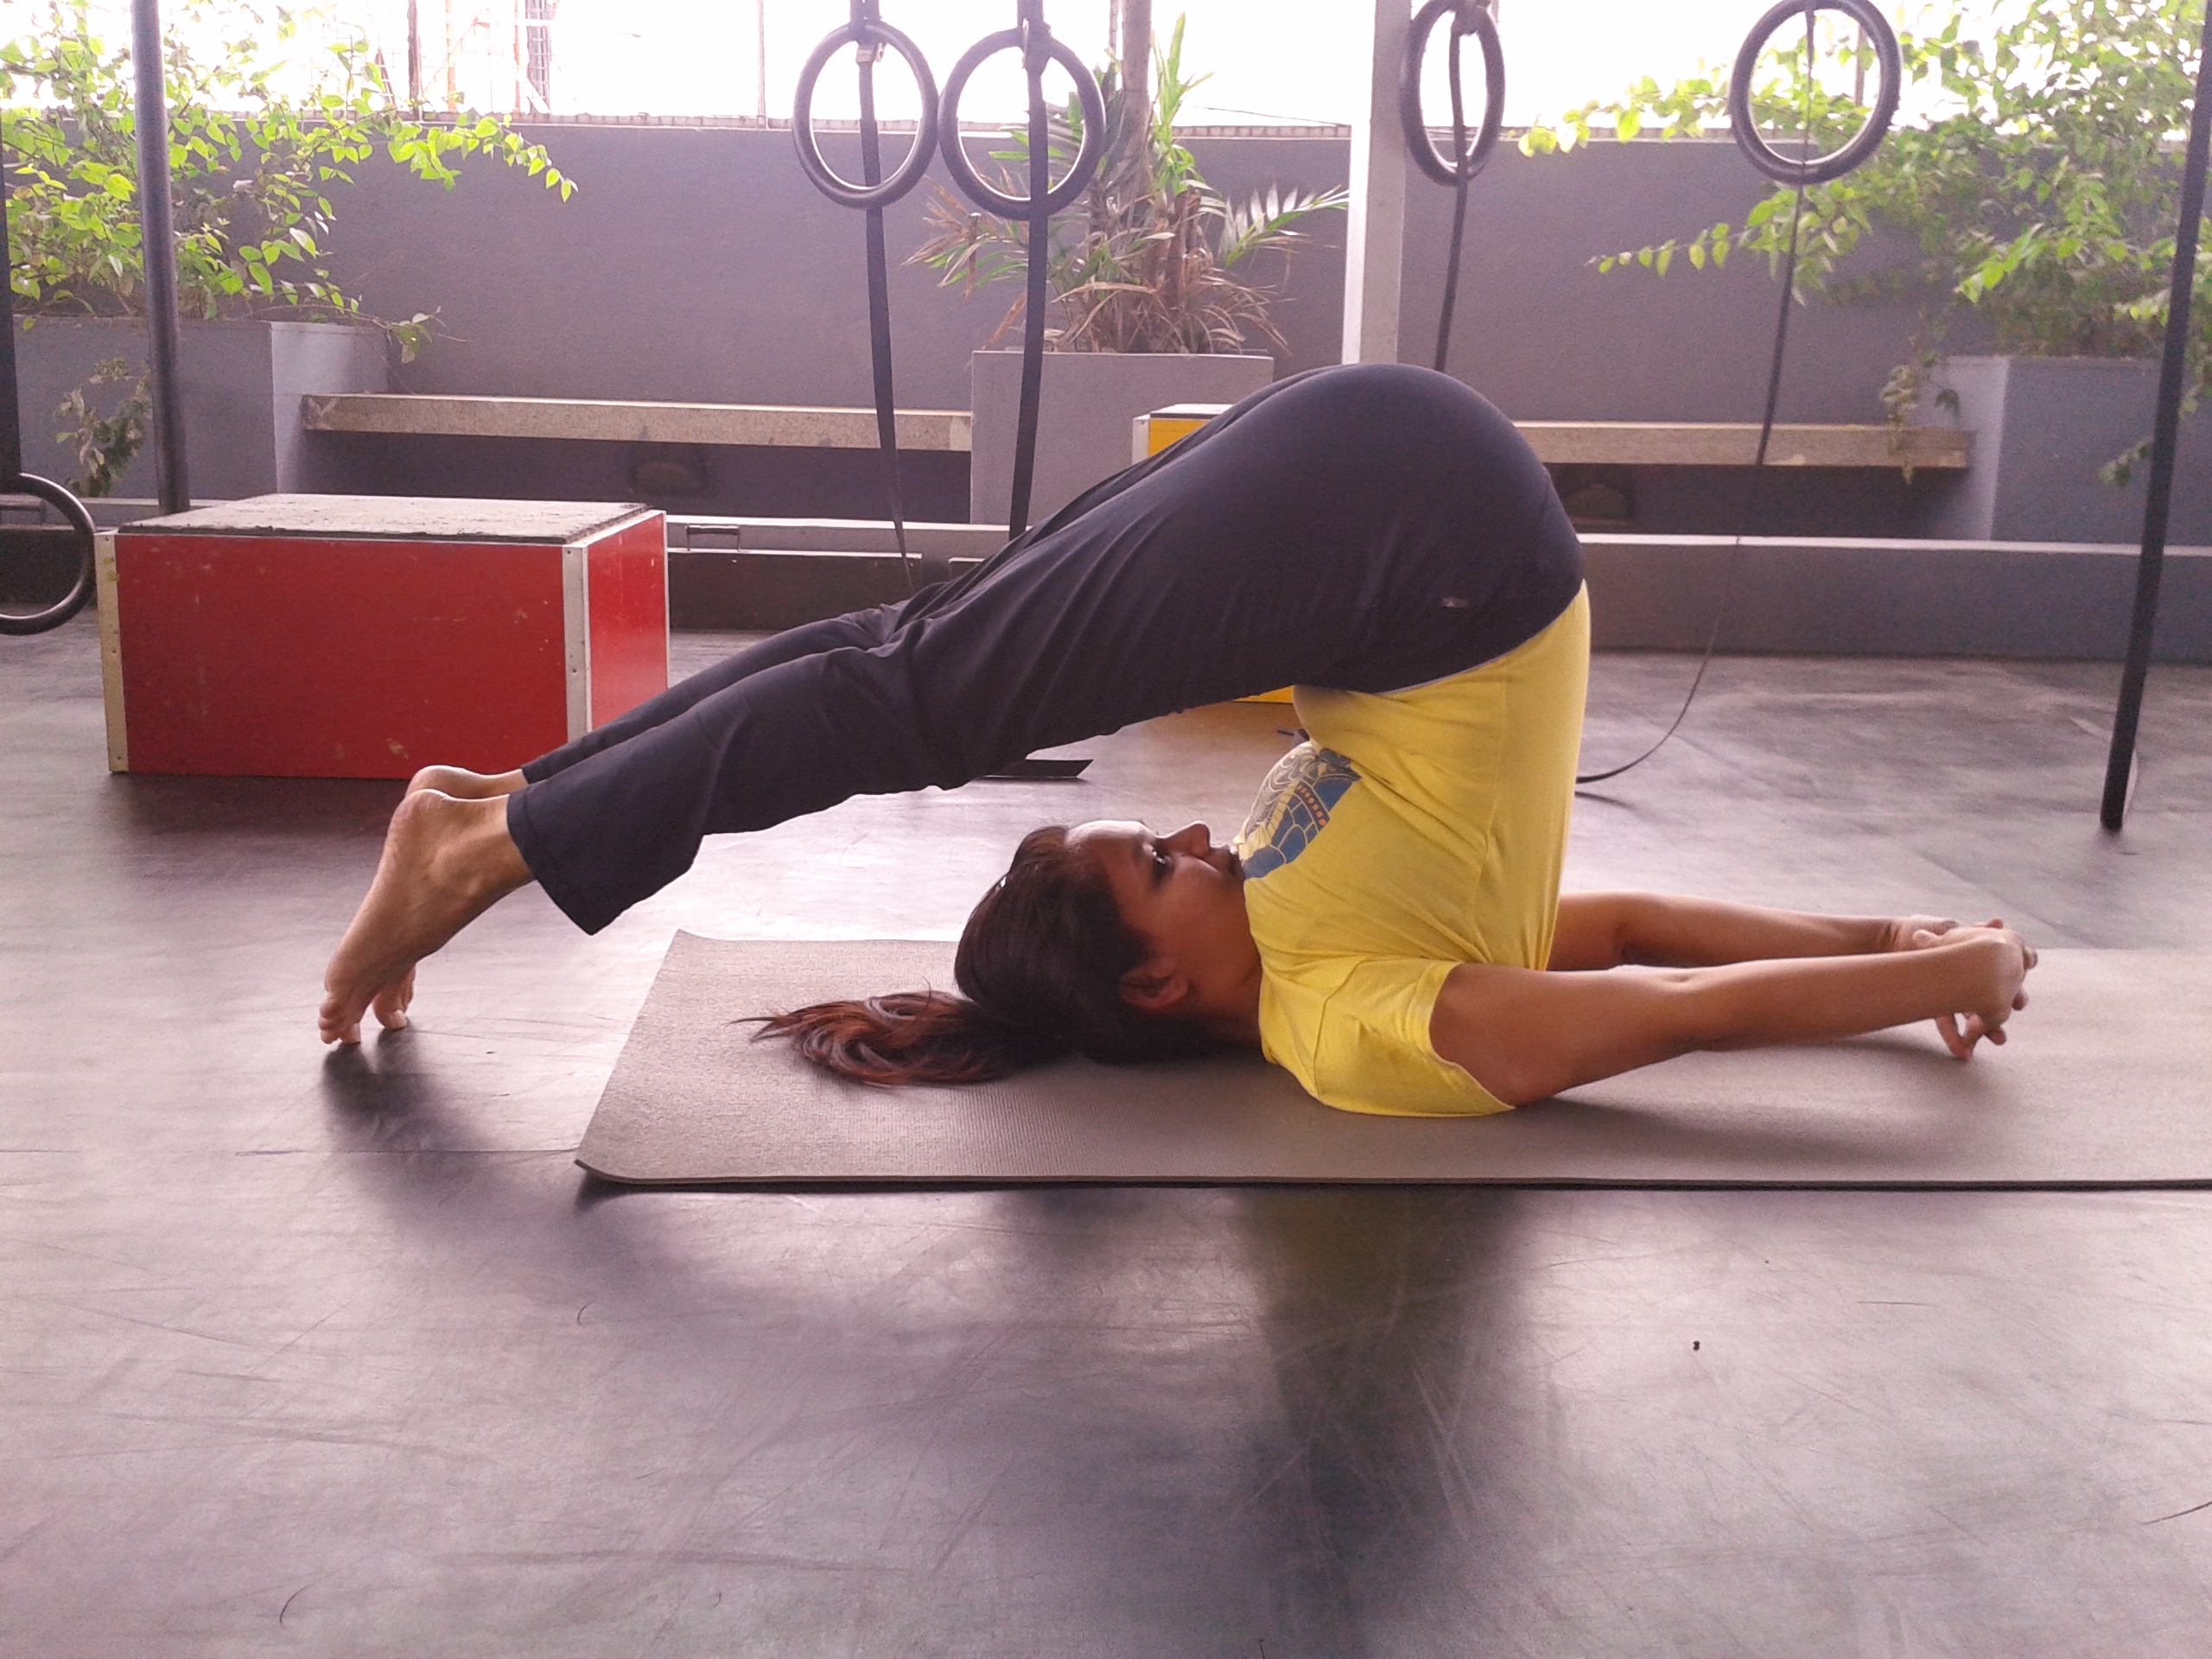
The Halasana is a pose that we do daily in class. We use props to ensure that the spine and neck are straight. The picture is of me doing the Halasana many years ago. When my internal dialogue was loud and overpowering. I’m sure it’s improved over the years. And after this class, I know how to work in this (and in all other asanas).
Halasana (Plough Pose)
How To
- Lie down straight on your back making sure your head lies on the floor.
- Exhale, bend your legs at the knees and bring your knees close to your chest.
- Lift your buttocks off of the floor supporting your back with your hands.
- Make sure to plant your elbows firmly on the floor.

- Bring your body perpendicular to the floor, until your sternum touches your chin.
- Gently extend your legs out behind your head.
- Keep your face and neck relaxed.
- Practice with your arms stretched out behind and fingers interlocked to relive pain and cramps in fingers, hands, wrists, elbows and shoulders.
Benefits
- Relieves fatigue.
- Helps to calm down the mind.
- Relaxes your eyes and brain.
- Controls hyper tension.
- Improves digestion.
- Lengthens the spine and improves alignment.
- Reduces insomnia and anxiety.
- Relieves stress-related headaches and migraines.
Contraindications
- Don’t practice during menstruation and if you have cervical spondylosis.

![2015-02-03 13.47.14[1]](https://yogawithpragya.com/wp-content/uploads/2015/02/2015-02-03-13-47-141-1.jpg)
![2015-02-03 13.36.53[1]](https://yogawithpragya.com/wp-content/uploads/2015/02/2015-02-03-13-36-531-1.jpg)
![2015-02-03 13.38.31[1]](https://yogawithpragya.com/wp-content/uploads/2015/02/2015-02-03-13-38-311-1.jpg)
![2015-02-03 13.40.17[1]](https://yogawithpragya.com/wp-content/uploads/2015/02/2015-02-03-13-40-171-1.jpg)
![2015-02-03 13.45.16[1]](https://yogawithpragya.com/wp-content/uploads/2015/02/2015-02-03-13-45-161-1.jpg)
![2015-02-03 13.43.55[1]](https://yogawithpragya.com/wp-content/uploads/2015/02/2015-02-03-13-43-551-1.jpg)