All of a sudden I have lots of people asking me how yoga can help with slipped and herniated discs. These are people who don’t want to go in for the surgery that the doctor has told them is inevitable. These are people who are not interested in taking drugs to numb the pain. Basically, these are people who have heard that yoga can help and want to manage their condition rather than let doctors cut them open.
So here are a set of moves that you should do in the sequence given below. You need to hold each posture on each side for about 10 minutes. So you do need to set aside about an hour to do this every day. Yes, do these every day. If you do this set of postures while you are experiencing the pain, you will get instant relief. Tried and tested.
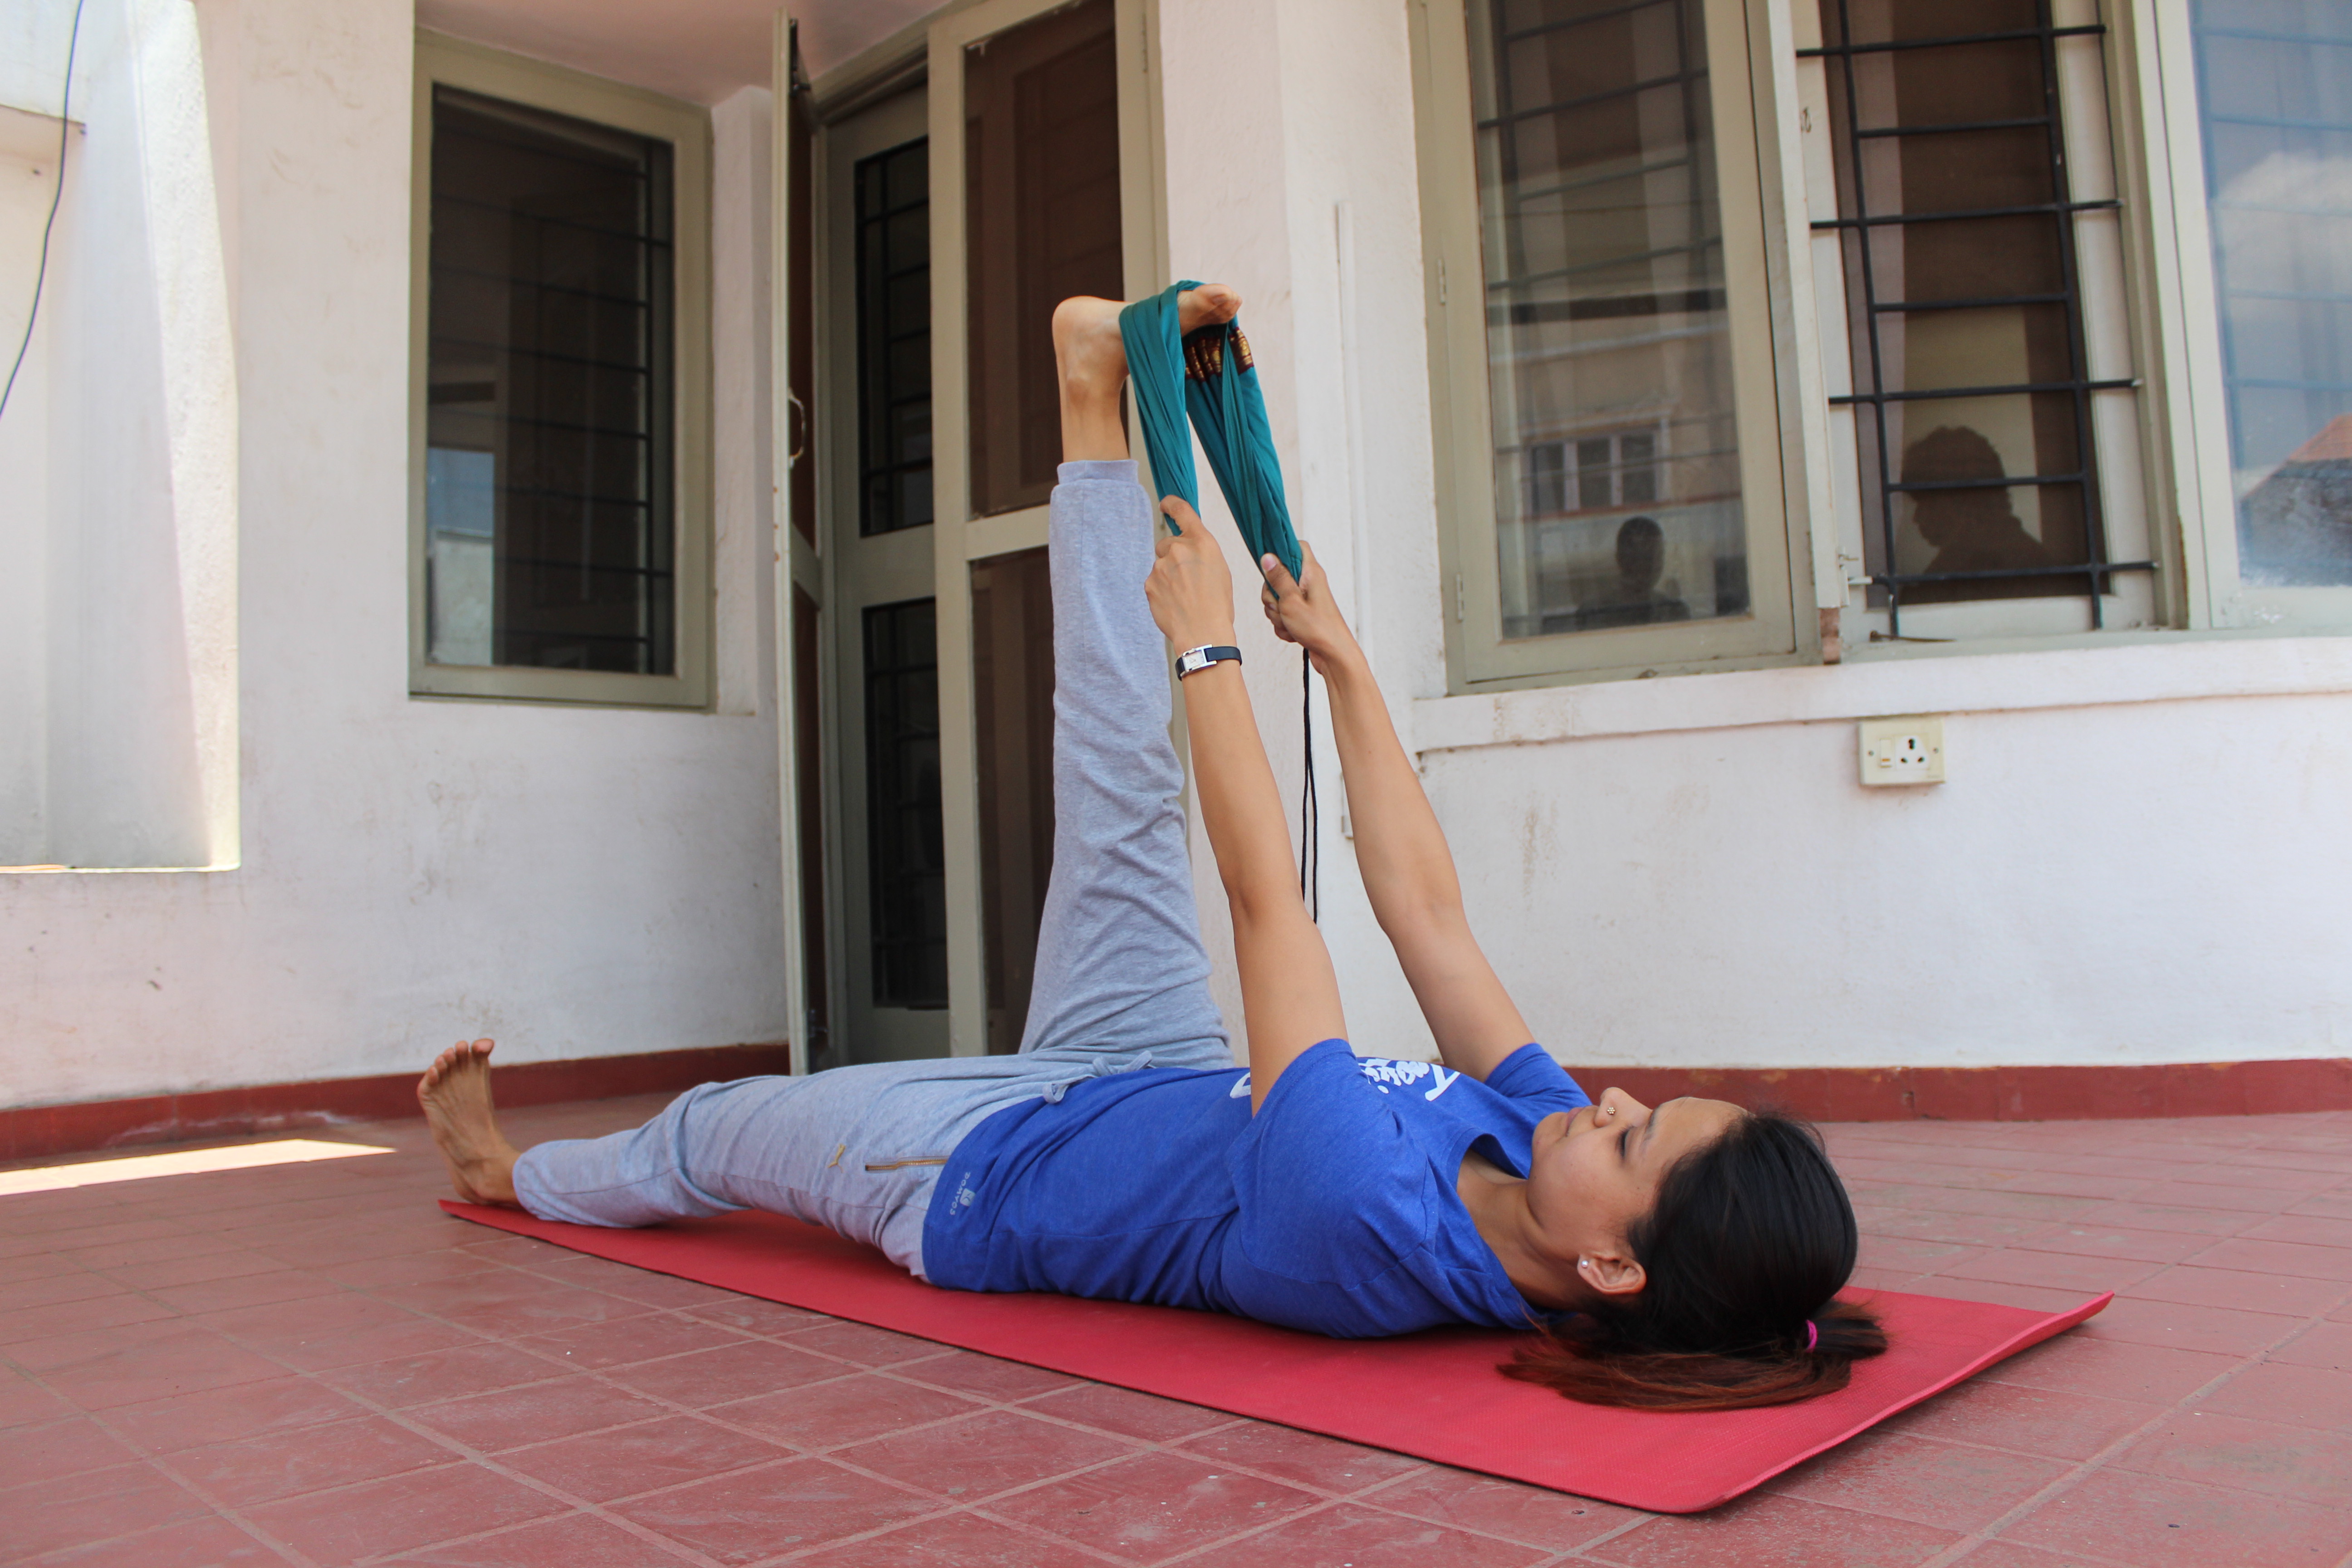
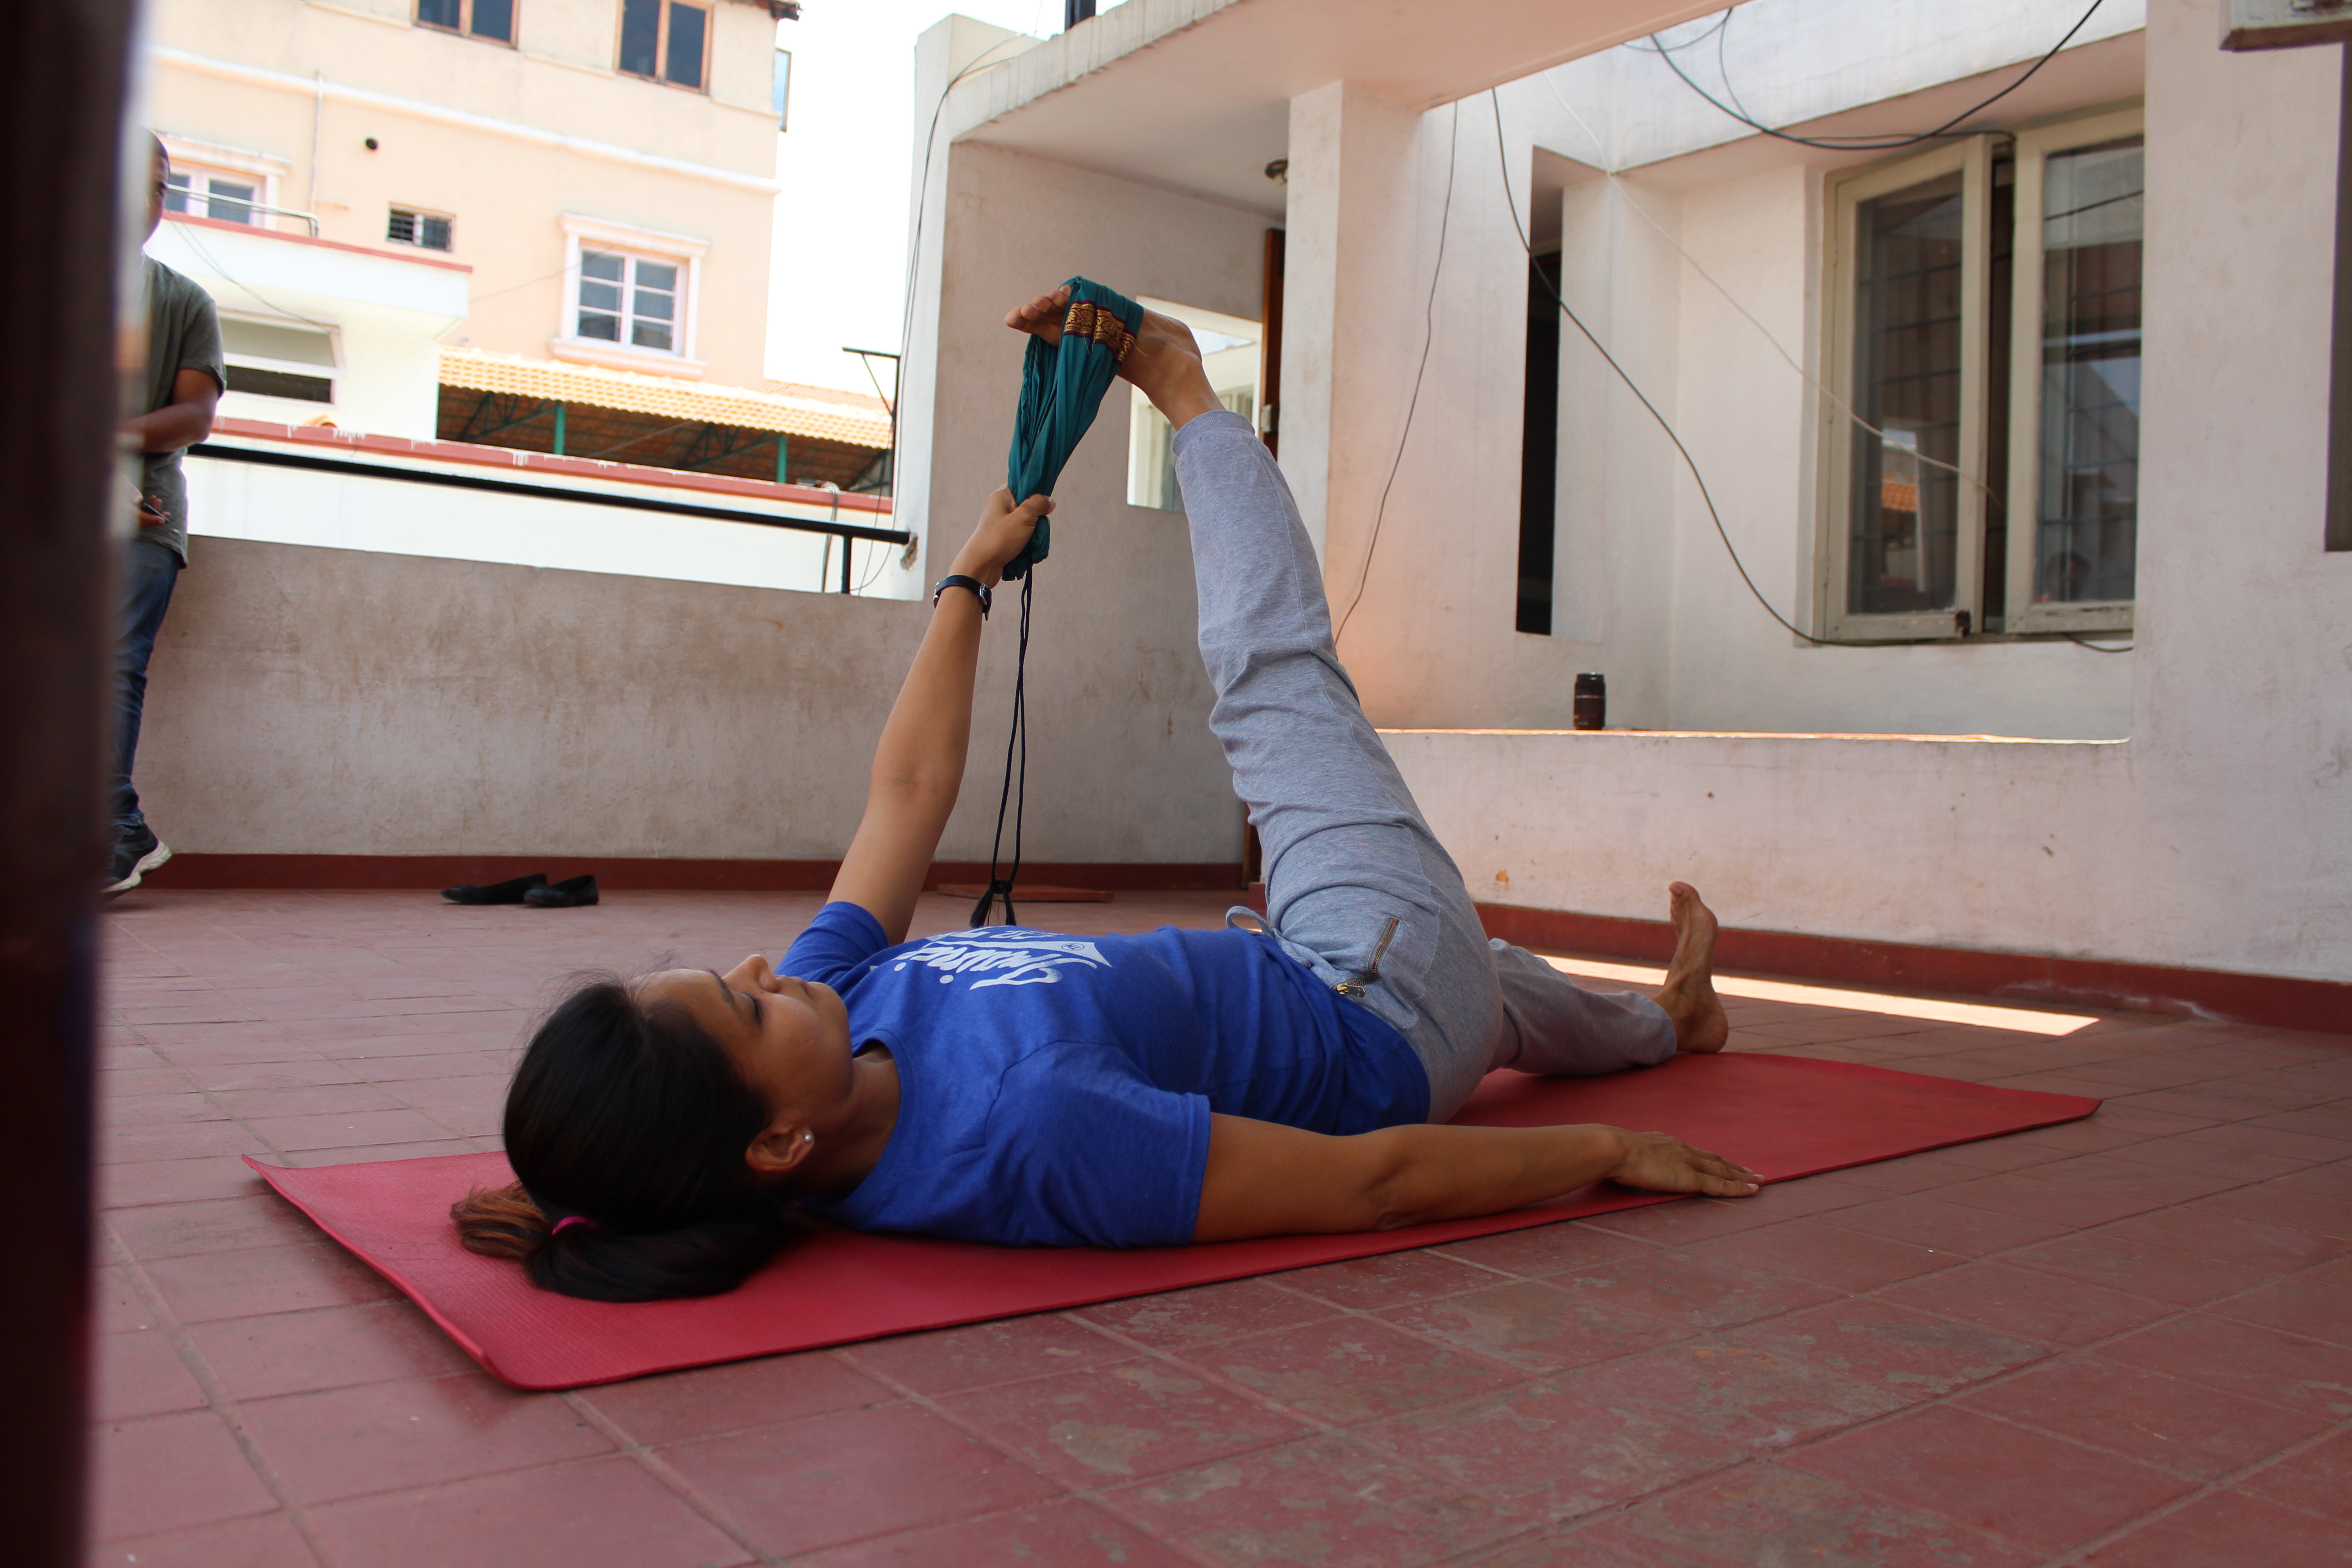
I only had a makeshift yoga belt with me when my friend and I found time to take these pictures. You can use a stole or a dupatta, basically anything long enough to use for these asanas.
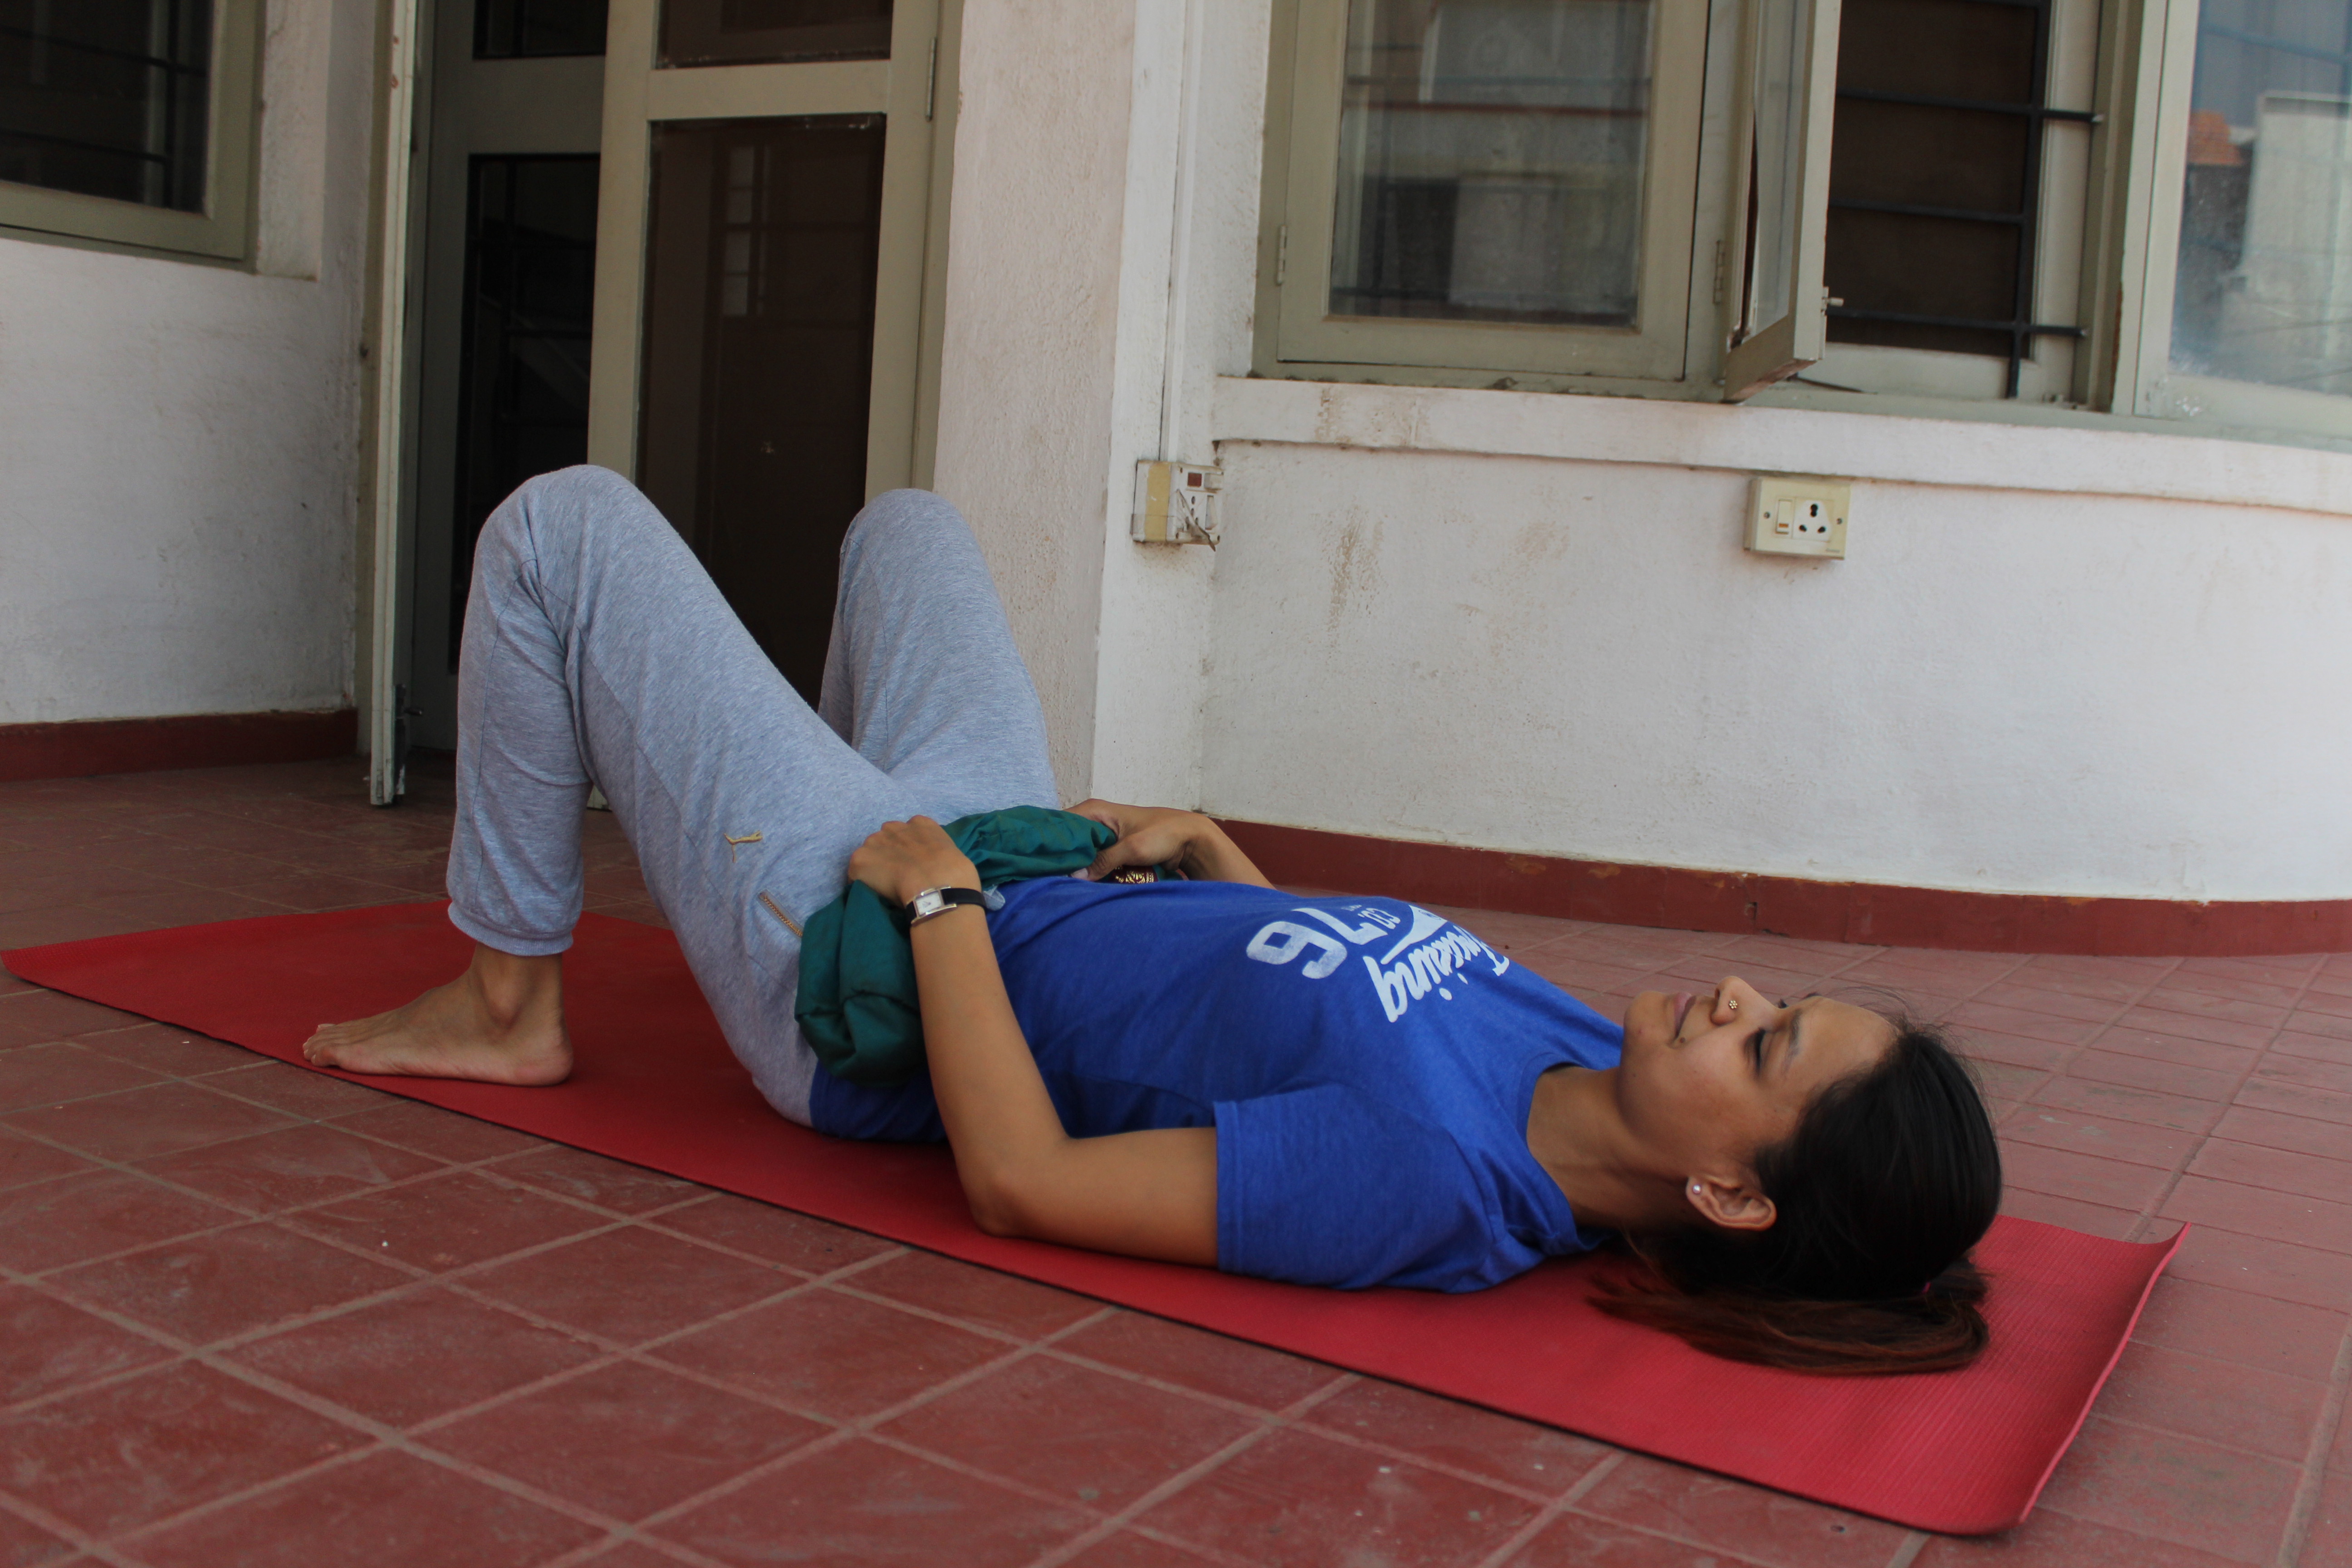
- Start with lying on the floor. You must fold your legs like in the picture. The lower back should lie flat on the floor.
2. Next loop the belt around one foot and straighten the leg. You lower back should still lie flat on the floor. Push the heel out. Keep the toes inclined towards your face. Also, people tend to think that the closer they can bring the leg to the torso, the ‘better’ it is. That is not true. You must keep the leg either straight up, perpendicular to the floor. If that’s too intense of a stretch for you, then you can bring the leg closer to the floor, until the stretch becomes tolerable. The heel must always stay extended outwards. Knee must be locked. Note: the other leg is bent with the foot on the floor. This is intentional and you must practice just like this.
3. Straighten the leg which is on the floor. Do this by slowly walking it out, and not by lifting it up and pushing it forward. You have to do all these movements slowly and carefully, after all, you want to be careful with you back. In this posture, both legs mimic each other. Knees are straight and locked. Heels are pushed out.
4. Next ease our leg on to the floor. Again, no jerky movements. Also, if you are unable to get the leg all the way down to the floor, you can use a pillow or a small table to rest you leg on. Heel pushed out. Knee locked. And the torso should be flat on the floor. Usually there is a tendency to lean to one side because of the weight of the extended leg.

5. Bring the leg back up and this time, ease it to the opposite side. Only 30 degrees to the other side. So lower back is still in touch with the floor. The opposite leg should stay active.
6. And finally, the posture which gives the most relief. For this one you will have to tie the ends of the belt together. Then insert a leg through the loop and put the opposite shoulder through the other end of the loop. Almost like you’re carrying a shoulder bag. Allow the leg to fall sideways. It doesn’t matter how close your knee/thigh/leg is to your torso. What matters is how relaxed your leg is.

Remember to practice each posture on both sides. Hold for 10 minutes on both sides. When done daily these moves ensure that your back pain is eliminated.
Thanks Sujith for the photos. 🙂