Most gym rats will tell you that you should work on sides and abs on alternate days. What makes yoga a great workout is that most yoga classes have varied routines and you will end up engaging different body parts even if you attend the same class 5 times a week. Some days it may be abs intensive, on other days, perhaps, arms. But, for the most part, you will use your body as a whole instead of just working out isolated body parts. So while you’ll work on sides pretty much in all your yoga classes, there are a few moves that you can do with a bit more awareness next time so that you can get the most out of them.
The Side Plank or the Vashishtasana
Most people tend to put most of their body weight on their arm and wrist when they do the side plank. Are you one of those? If your wrists hurt when you do this move, then the answer is yes. The key to improving your form and increasing the amount of time you can hold this move is in how you engage your arms. Tightening the mus![IMG-20150209-WA0016[1]](https://yogawithpragya.com/wp-content/uploads/2015/02/img-20150209-wa00161-1.jpg) cles of your arms helps in taking the pressure off of your wrists. To do this you can try and spread your fingers out wide on the floor. And the push your shoulders away from your ears. So on hand reaches all the way up to the sky and you stretch your shoulder blades as well. The other hand pushes into the floor, so you try and dig your fingers into the floor also. The neck should be relaxed. Sometimes you may not realize that your neck is strained. A good way to ensure that your neck is easy is to smile and allow your face to relax. This relaxes the neck as well.
cles of your arms helps in taking the pressure off of your wrists. To do this you can try and spread your fingers out wide on the floor. And the push your shoulders away from your ears. So on hand reaches all the way up to the sky and you stretch your shoulder blades as well. The other hand pushes into the floor, so you try and dig your fingers into the floor also. The neck should be relaxed. Sometimes you may not realize that your neck is strained. A good way to ensure that your neck is easy is to smile and allow your face to relax. This relaxes the neck as well.
Once your arms take on the proper form, you can start to work on your sides. Keep your stomach tight at all times and then gently push your hips up towards the sky. This gives you a little elevation and also ensures that you keep your awareness on your core. That little lift makes a huge difference, else you may tend to sag down closer to the floor, which will put more strain on the shoulders. Finally, keep your knees locked. This will ensure that you are engaging your legs in maintaining the balance as well.
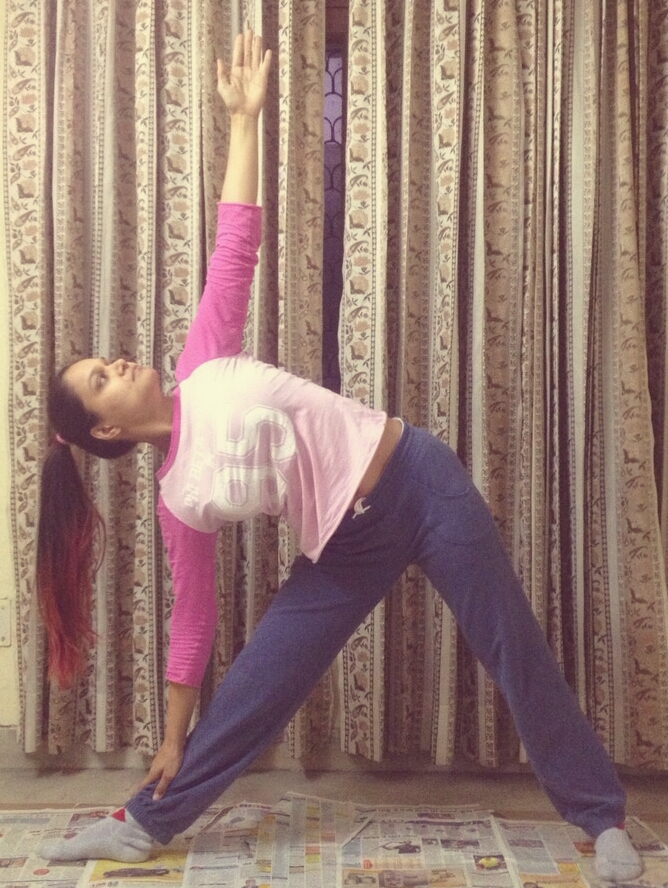
The Trikonasana or the Triangle Pose
Despite years of practice, I feel that it is only now that I’ve really started appreci![IMG-20150209-WA0003[1]](https://yogawithpragya.com/wp-content/uploads/2015/02/img-20150209-wa00031-1.jpg) ating this pose. All yoga poses give you a sense of release and relaxation post the practice. If you don’t feel it now, with consistent practice, you eventually will. The key to the Trikonasana is doing it step-by-step. Many students go into the pose with the end picture in mind. Yes, many experienced students as well. But that just leads to a compromise with the geometry of pose. Do it stepwise and when you finally bend down make sure you bend from the waist. Your torso should be parallel to an imaginary wall. Try and get both shoulders in one line and reach up to the sky and down to the floor almost drawing your shoulder blades apart. Make the pose active right through your fingertips. Focus on your feet as well. The inner edge of the front foot will go into the floor and the outer edge of the back foot will be pushed into the floor and this will give you stability in this pose.
ating this pose. All yoga poses give you a sense of release and relaxation post the practice. If you don’t feel it now, with consistent practice, you eventually will. The key to the Trikonasana is doing it step-by-step. Many students go into the pose with the end picture in mind. Yes, many experienced students as well. But that just leads to a compromise with the geometry of pose. Do it stepwise and when you finally bend down make sure you bend from the waist. Your torso should be parallel to an imaginary wall. Try and get both shoulders in one line and reach up to the sky and down to the floor almost drawing your shoulder blades apart. Make the pose active right through your fingertips. Focus on your feet as well. The inner edge of the front foot will go into the floor and the outer edge of the back foot will be pushed into the floor and this will give you stability in this pose.
Note on this pose. Iyengar said in an interview that even after countless years of practice, writing books and articles, conducting workshops all over the world etc, he is still working on getting his awareness to his smallest toe in the Trikonasana.
The Parsvakonasana or the Side Angle Pose
The base work in this pose is similar to the Trikonasana. What you need to take care of most in this pose is that the knee is right above the ankle. The inner edge of the foot should be strong on the floor. Keep the thigh parallel to the floor. Extend your arm out and keep it close to your ear. Keep your gaze on your fingers but relax the neck. Feel the extension on the side of the body, from your foot all the way to the finger tips.
![IMG-20150209-WA0005[1]](https://yogawithpragya.com/wp-content/uploads/2015/02/img-20150209-wa00051-1.jpg)
Questions? Queries? Let me know!
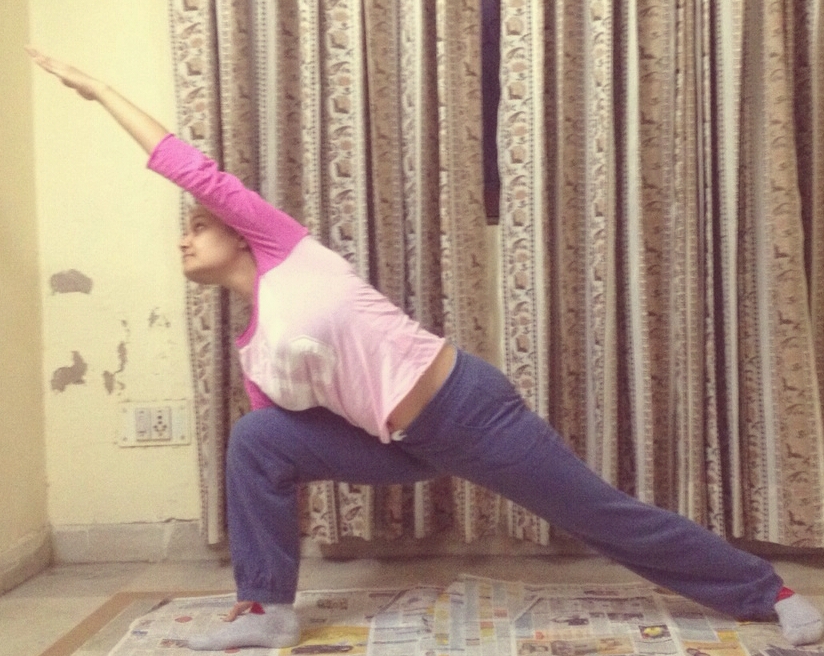 There should be a uniform stretch along the side of your body. Make sure the side of your body doesn’t rest on the thigh. To ensure this you may want to slightly lift your hand off of the floor ensuring your core and your legs have to support your body weight. Look up at your finger tips. Relax your neck and face.
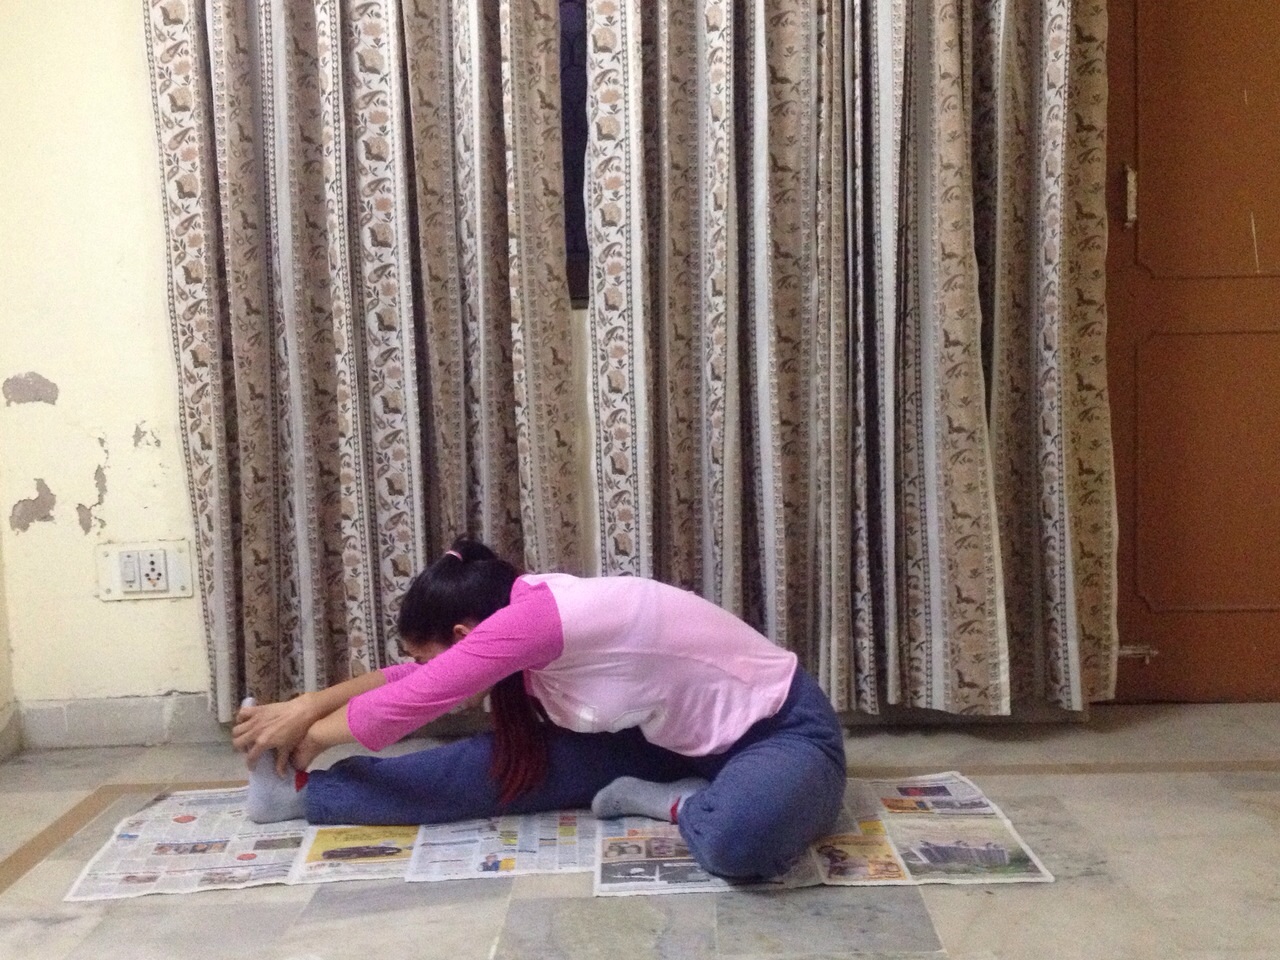 Do this pose in the end to stretch the back of your legs. However, in this pose, as in all other poses, pay attention to your core. You want to make sure that you pull your stomach in and extend forward keeping your back straight. This will ensure a deeper stretch. Aim to get your chin to the knee instead of forehead to knee. Also, make sure you cross your arms when you reach forward. This ensures that the stretch on your back is even.